how to connect circuit breaker wiring?
Understanding how to connect circuit breaker wiring is a crucial skill for any homeowner or DIY enthusiast. This comprehensive guide will walk you through the process step-by-step, ensuring you can safely and effectively complete this task. We'll cover everything from the basics of circuit breakers to the specifics of wiring, including safety precautions, tools needed, and detailed instructions. Let's get started!
Table of Contents
- What is a Circuit Breaker?
- Safety Precautions
- Tools Needed
- Step-by-Step Guide to Connecting Circuit Breaker Wiring
- Troubleshooting Common Issues
- Summary
What is a Circuit Breaker?
A circuit breaker is an essential component of any electrical system. It's designed to protect your home's electrical circuits from damage caused by overloads or short circuits. When the current flowing through a circuit exceeds the rated capacity of the breaker, it will "trip" or switch off, interrupting the flow of electricity to prevent potential damage or fire hazards.
Safety Precautions
Before we delve into the process of connecting circuit breaker wiring, it's crucial to understand the safety precautions. Working with electricity can be dangerous if not done correctly.
- Turn off the power: Always turn off the power at the main circuit breaker before starting any electrical work.
- Use insulated tools: Use tools with insulated handles to protect yourself from electric shock.
- Wear protective gear: Wear rubber-soled shoes, safety glasses, and gloves to protect yourself.
- Never touch live wires: Never touch wires unless you're sure they're not live. Use a voltage tester to confirm.
Tools Needed
Having the right tools can make the process of connecting circuit breaker wiring much easier. Here's what you'll need:
- Screwdriver
- Wire stripper
- Voltage tester
- Needle-nose pliers
- Insulated gloves
- Safety glasses
Step-by-Step Guide to Connecting Circuit Breaker Wiring
Now that we've covered the basics, let's dive into the step-by-step process of connecting circuit breaker wiring.
Step 1: Turn Off the Power
Before you start, ensure the power is turned off at the main circuit breaker. This is the most important safety step to prevent electric shock.
Step 2: Remove the Panel Cover
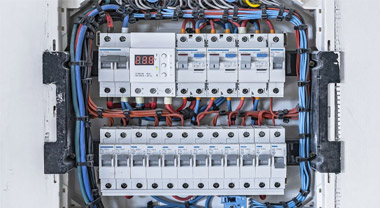
Remove the screws holding the panel cover in place and carefully remove the cover. This will expose the circuit breakers and wiring inside.
Step 3: Install the New Circuit Breaker
Insert the new circuit breaker into an open slot on the panel. Make sure it's securely in place and switchedto the "off" position.
Step 4: Prepare the Circuit Wires
Using your wire stripper, strip about half an inch of insulation from the ends of the wires that will be connected to the new circuit breaker. You should have a black (hot) wire, a white (neutral) wire, and a bare (ground) wire.
Step 5: Connect the Wires
Connect the black wire to the circuit breaker by inserting it into the terminal and tightening the screw. Connect the white wire to the neutral bus bar in the same way, and connect the bare wire to the ground bus bar.
Step 6: Test the Circuit
Turn the new circuit breaker to the "on" position and use a voltage tester to check the circuit. If the tester lights up, the circuit is live and the wiring is correct. If not, double-check your connections and try again.
Step 7: Replace the Panel Cover
Once you've confirmed that the circuit is working correctly, replace the panel cover and secure it with the screws.
Troubleshooting Common Issues
Even with careful preparation and execution, you might encounter some issues when connecting circuit breaker wiring. Here are some common problems and their solutions:
- Circuit breaker keeps tripping: This could be due to an overload or short circuit. Check the devices connected to the circuit and make sure they're not drawing more power than the circuit can handle.
- No power in the circuit: Check your connections and make sure the circuit breaker is in the "on" position. If everything seems fine but there's still no power, the circuit breaker might be faulty and need replacement.
- Sparks or burning smell: This is a serious issue that could indicate a short circuit or other serious problem. Turn off the power immediately and consult a professional electrician.
Summary
Connecting circuit breaker wiring is a task that requires careful attention to safety and detail. With the right tools and this step-by-step guide, you can successfully complete this task and ensure your home's electrical system is safe and functional. Remember to always turn off the power before starting any electrical work, use insulated tools, and never touch live wires. If you encounter any issues or feel unsure at any point, don't hesitate to consult a professional electrician.
By understanding the function of a circuit breaker and learning how to connect its wiring, you're taking a significant step towards becoming more self-reliant and knowledgeable about your home's electrical system. Keep practicing, stay safe, and happy wiring!


